Some dishes don’t need a lot said about them, and this is one of them! It’s quick, simple, light and delicious. For me, the marmite is what brings all of the elements of the dish together, but it can easily be omitted. If you do remove the Marmite, add another 2 cloves of garlic and a little extra salt when seasoning.
Ingredients (serves 2):
4 cloves of garlic
10 thin slices of salami
1 tbsp Marmite
1 large knob of butter
A small handful of basil, roughly chopped
175g dried conchiglie
Method: Pre-heat your oven to 150c/130c fan/gas mark 2. Wrap the garlic in a layer of tin foil and gently roast for roughly 25 minutes, until very soft and the inside of the garlic clove has baked down to a paste.
After the garlic has been roasting for 15 minutes, spread the salami on a lined baking tray and add it to the oven with the garlic until crispy, about 10 minutes. When crisp, tear into quarters.
Bring a pan of water, with plenty of salt in, to the boil. Add the dried pasta to the water and cook as advised on the label.
When cooked, drain the pasta, reserving ½ cup of the cooking water. Put the pasta, cooking water and large knob of butter back into the pan and mix well over a low heat.
Add the marmite, garlic cloves (skins removed) and salami quarters to the pan and stir well until everything is heated through. Add a pinch of ground black pepper to taste and serve while hot. Shred the basil and scatter over the top to finish.
As a student, I know how easy it is to buy your soup from your closest Every Little Helps store. It takes no time at all, costs very little money and most importantly – there is next to no washing up.
For the same amount of time and washing up, you can create a soup that is marginally more expensive, but is unbelievably delicious. Not only that, but it freezes very well, so one large batch can sort your lunches for a week and cost as little as 60p per portion.
Luckily, I had a jar of chilli jam kicking around, but in this recipe, you can substitute the jam for one extra apple and a teaspoon of dried chilli flakes. Serve with a little crème fraiche to offset the heat.
Ingredients (serves 4):
1 large onion, peeled and roughly chopped
2 medium butternut squash, peeled and diced
2 cox apples, peeled and diced
1 litre vegetable stock
1 tbsp olive oil
1 tsp fennel seeds
1 tbsp chilli jam
1 tbsp garam masala
Method: Add the oil to a large, heavy based pan on a medium-high heat. When the oil is hot, add the squash, onion, apple and garam masala.
Stir so that everything has an even covering of oil and spice and cook for 4 minutes, or until the apple, onion and squash has gently coloured. Add the vegetable stock, fennel seeds and chilli jam and stir until incorporated well.
Bring the pan to the boil, and then simmer for 15 minutes, or until the squash is soft.
Take the pan off the heat and blend well with a stick blender, ensuring there are no large chunks of squash or apple. Season to taste. Serve while hot or freeze for up to 3 months.
Clementine curd doughnut at HH Bakery. Source: DWD.
As December approaches, we enter the height of clementine season. The smell of this amber fruit immediately sends me back to countless Christmas mornings, rummaging amongst chocolate coins and christmas parcels to the bottom of my stocking where I could find a clementine or two.
Here I use clementines to make a delicious curd, which is both sharp and sweet in equal measure. It is hugely versatile and can be used in place of any recipe that calls for lemon curd, for a festive alternative. I pipe the curd into doughnuts, until they are fit to burst (around 40g of curd per large doughnut).
Ingredients (makes 900g):
7 large clementines
2 lemons
350g caster sugar
4 eggs, beaten
3 egg yolks, beaten
100g unsalted butter, diced
Method: Set up an bain marie by heating a large pan of water to a gentle boil. Add a heat-proof bowl over the pan but ensure the water is not in contact with the bottom of the bowl.
Zest and juice all of the fruit and add it to bowl, along with the yolks, eggs and sugar and mix to combine.
Add the butter and stir constantly, so as not to scramble the eggs. Cook until the curd is thick, and coats the back of a spoon at least.
Either add to sterilised jars as a beautiful Christmas gift or keep, refrigerated, until needed. The curd will keep for up to two weeks.
My Instagram feed seems to be a magnet for comments from my Dad, which usually run along the lines of: “remember you’re a student,” but can escalate as far as “Celeriac gratin!? You’re a f**king student!”. Just recently, after plunging nearly all of my income into a new project (blog post to follow soon), I began to realise – I am a student.
If the meals I make were movies, as a director I am a Steven Spielberg/Quentin Tarantino hybrid. I don’t cook regularly, but when I do I tend to spend a lot of money (not just on ingredients but utensils I will probably never use again), I create mess, occasionally there is blood – but the soundtrack is good.
Student suppers are my low-budget, independent films starring actors you’ve either never heard of, or that you believed to be dead. They are films that are initially made out of necessity but do occasionally win an award, which is what is most important.
Over the coming months I will be posting low-budget meals that are not only quick but delicious. If you have any suggestions, questions, or would simply like advice on low-cost cooking, please get in touch.
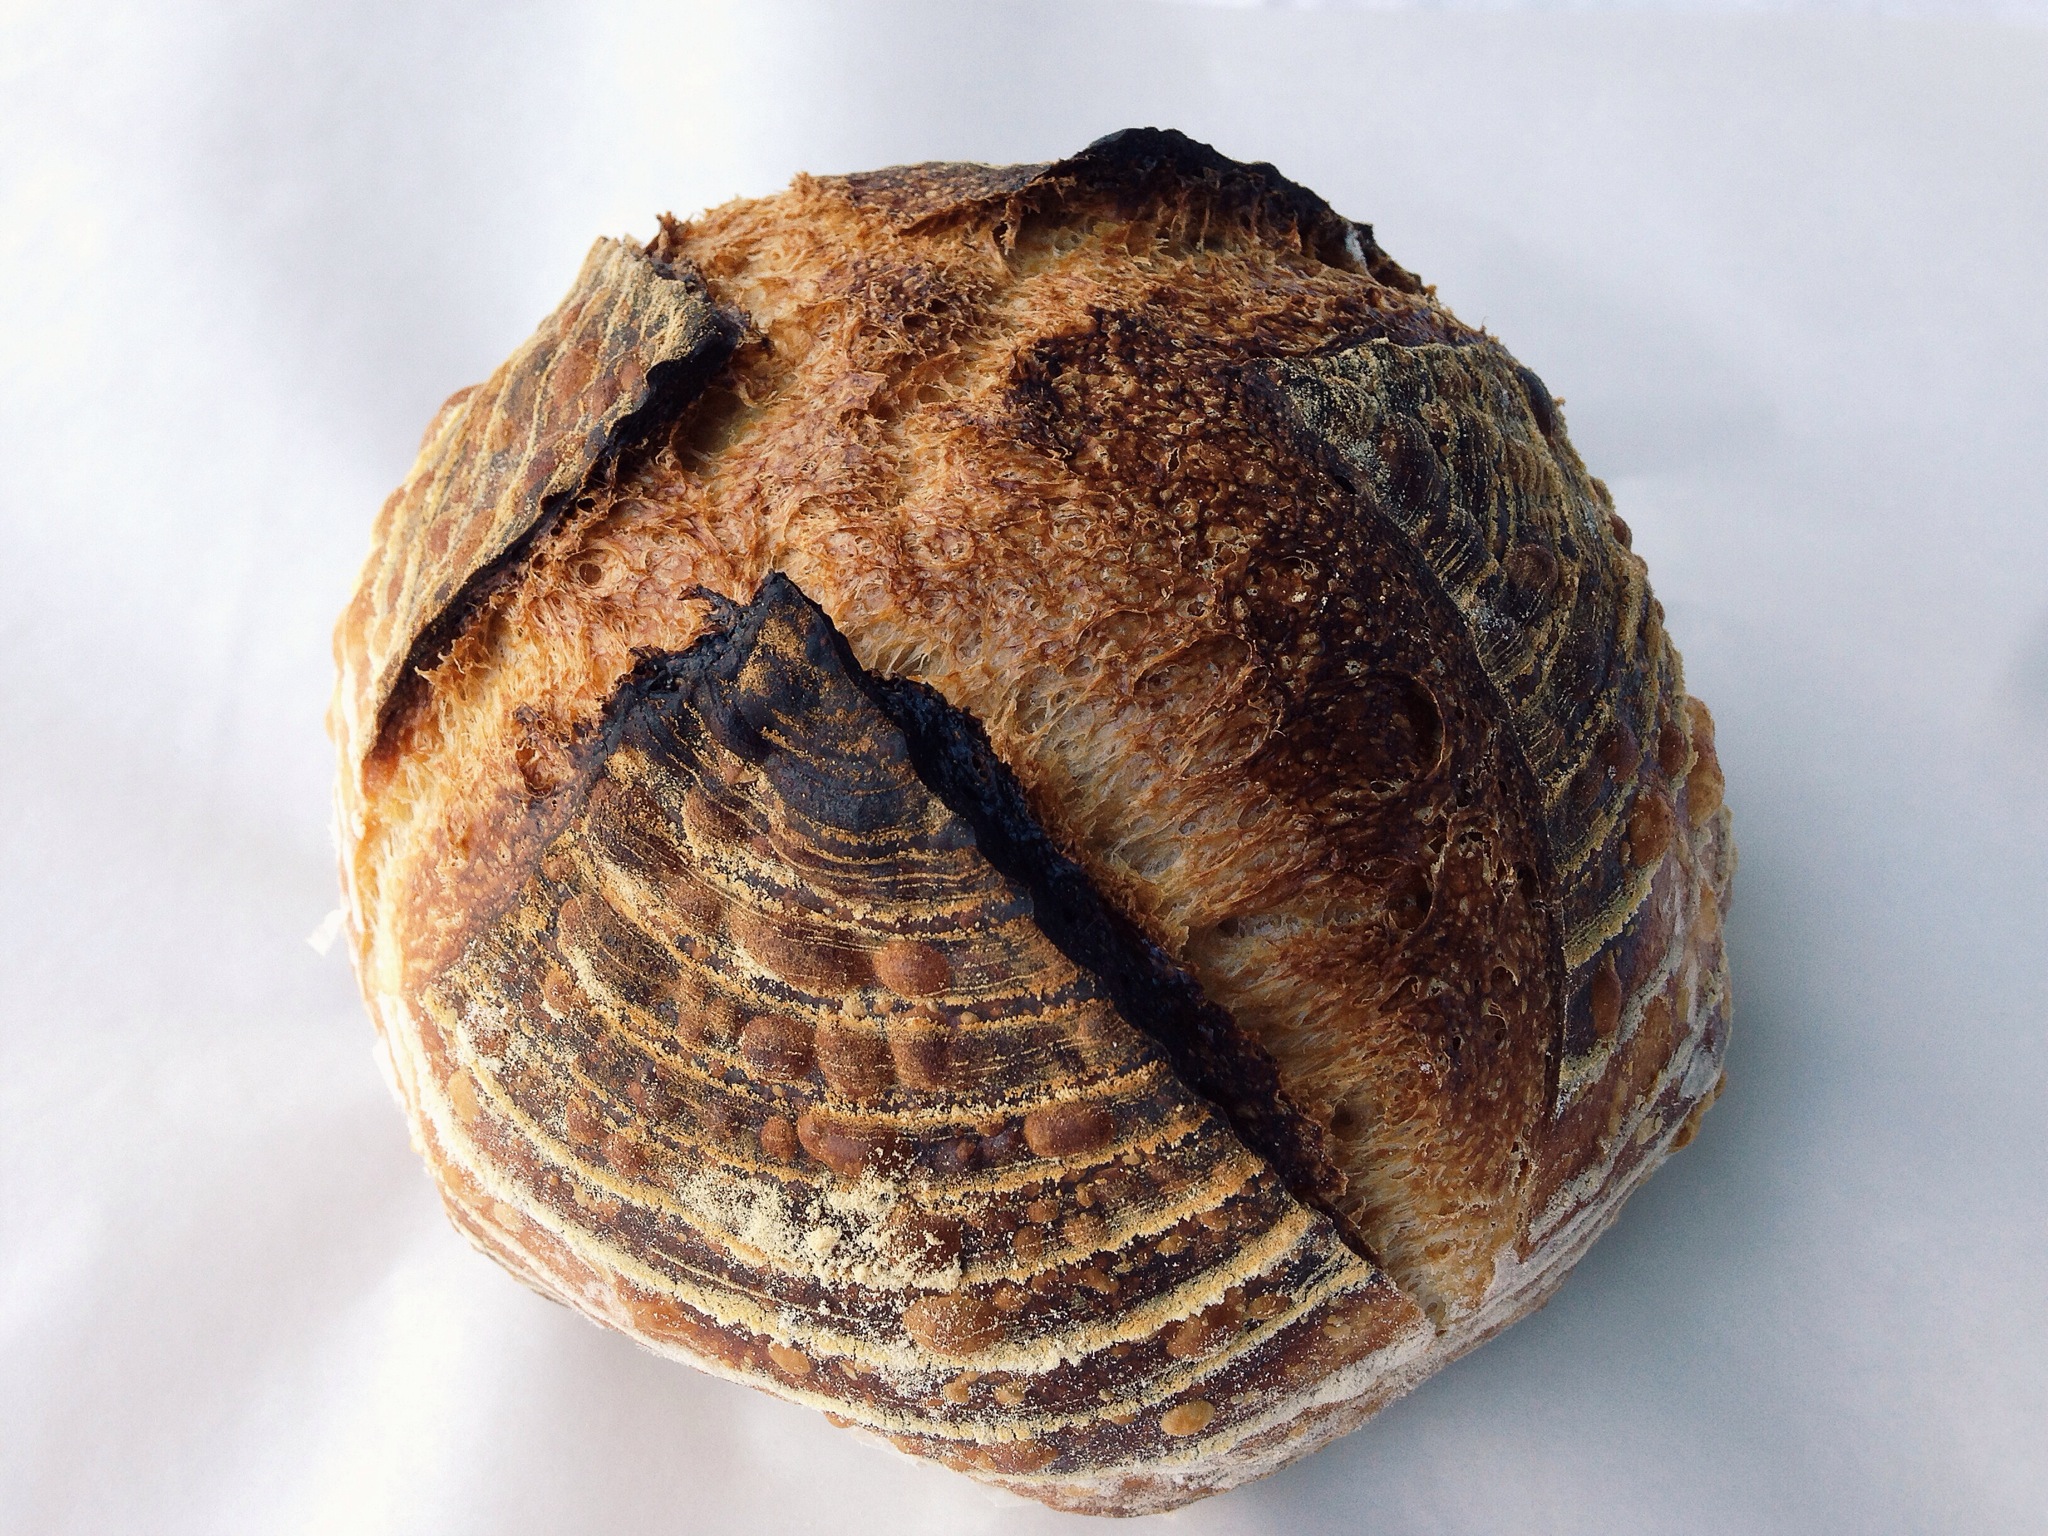
Naturally leavened bread, or sourdough, is one of the most satisfying things a baker can wish to pull from their oven. It does take time and a little patience, but the result will undoubtedly be some of the finest bread you have ever tasted.
Sourdough baked at home. Source: DWD.
Sourdough’s name refers to the slight tang in flavor caused by the production of acids during the retarded (cold) final proof, which can last from anything between 10 and 18 hours.
With a good method and an attention to detail, anyone can bake great tasting sourdough at home.
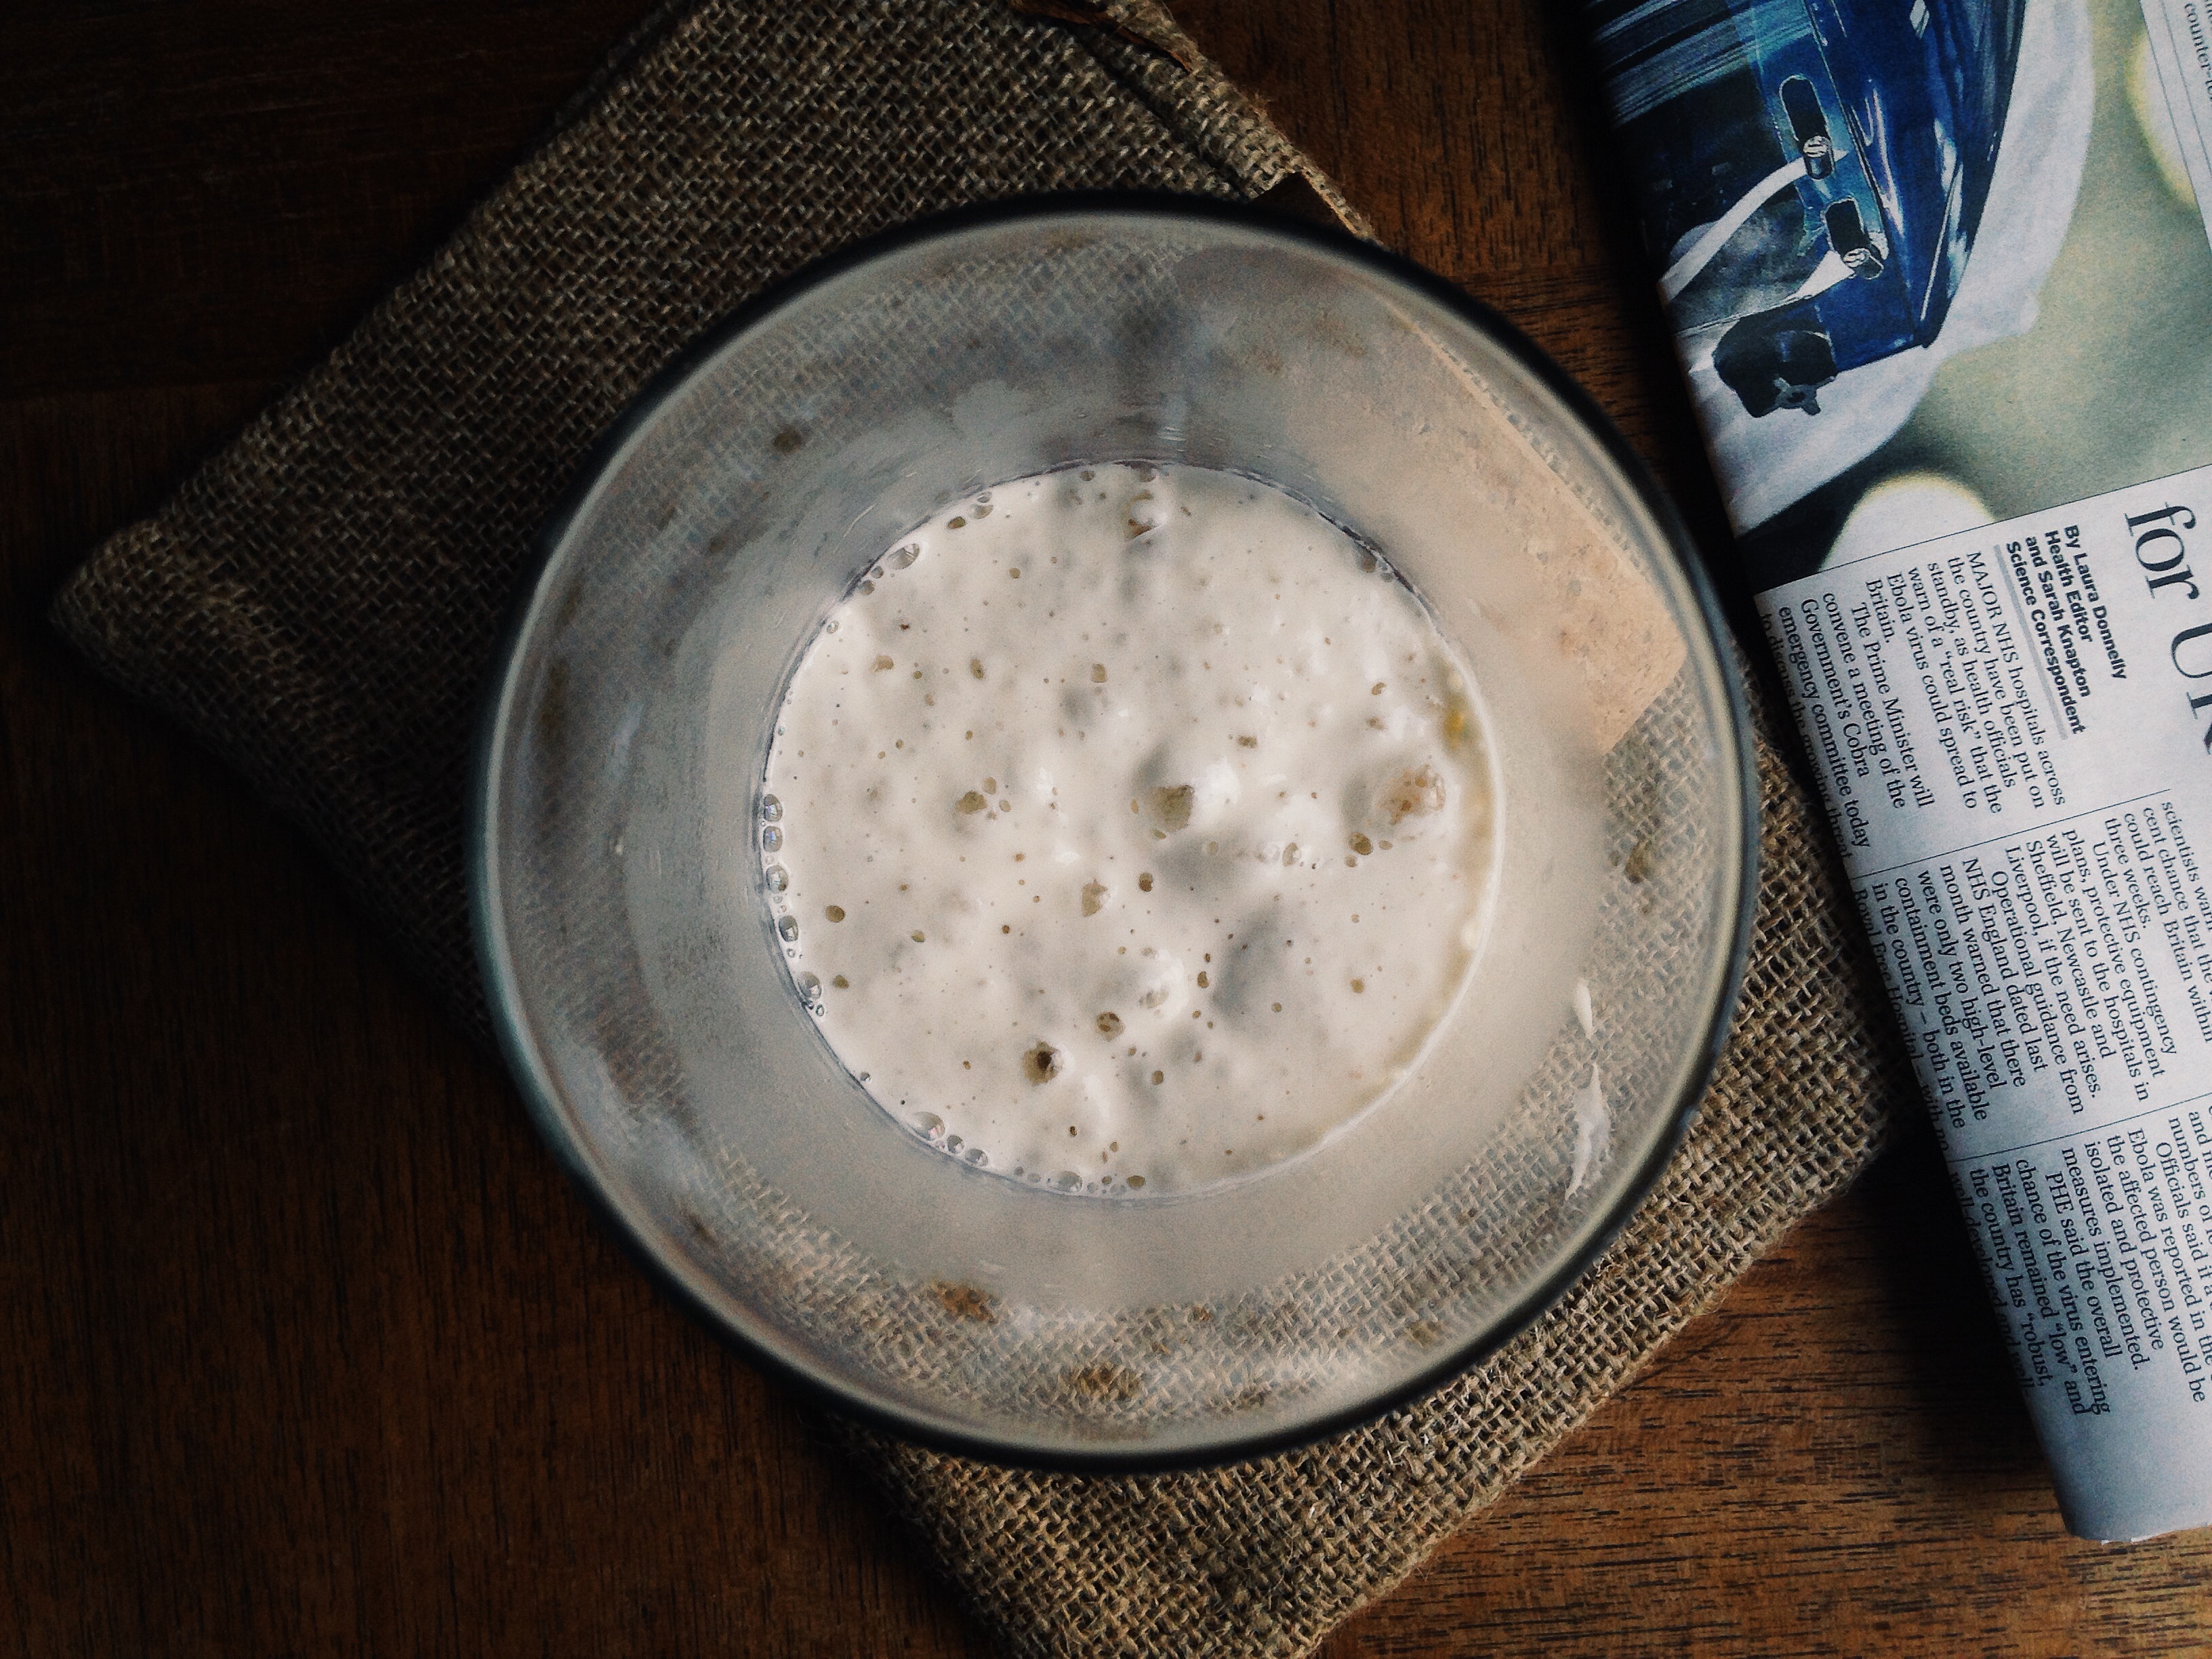
The starter. Source: DWD.
First, you will need what’s called a starter. This is a small quantity of flour and water that you leave to rest for a short period of time. With the help of natural bacteria (on your hands, in the air, in the flour), a yeast culture will form and it is this that you will use to make your bread rise.
You will use this starter every time you want to bake bread, so look after it: name it, nurture it, and make sure it’s always looking healthy.
The starter:
It’s important to be as accurate as possible when measuring flour and water quantities, and if you can, try to carry out each step at a similar time each day. Working the process of feeding your starter into your daily routine will make sure it is always strong and active.
In your container, mix together 25g of bread flour with 25g of water, using a fork to beat out any dry clumps of flour until you have a thick, smooth batter. Cover, and place in a warm spot (22-26c) to rest for 24hrs.
Day 2:
Scatter a little (5g) of bread flour over the batter and leave to rest for another 24hrs.
Day 3:
Add 50g of bread flour and 50g water to your starter, again mixing with a fork until smooth. Cover, and place in a warm area and leave to rest for another 24hrs.
Day 4:
By now your starter may be showing signs of life! Very small air pockets within the batter, visible from the side of your container, or a slightly acidic smell are both good signs that your starter is building up strength.
If your starter doesn’t exhibit any of these symptoms yet, simply scatter a little (5g) flour on the surface and leave to rest for another 24hrs.
If your starter is looking active, it is time to ‘feed’ it.
Pour away 100g of your starter, and to the remaining 100g in the container, add 50g bread flour and 50g water, beating together as you have done on previous steps. Cover, and leave in a warm place for 24hrs.
Day 5:
By now your mixture should be active. Discard 100g of your starter and add 50g of bread flour and 50g water. Mix together and cover, leaving it in a warm place for 24hrs.
Repeat step 5 for another two days, and by day 7 your starter should be strong enough to bake with.
After each feed you should be able to notice a regular ‘rise and fall’ in the starter. After you have fed it, the starter should appear relatively inactive, as it did at the beginning. It should smell milky and slightly sweet.
The starter immediately after feeding. Source: DWD.
Two or so hours after the feed you should see an increase in volume, with air pockets in the batter visible from the side of your container and on top of the starter. It should still smell sweet, but with an acidic smell starting to build.
The starter two hours after feeding. Source: DWD.
Roughly four hours after your feed the starter should be obviously active, often nearly doubling in size. At this stage the starter is referred to as ‘young’ and it should still exhibit a slightly milky aroma. The further into the 24-hour rest the starter goes, the more ‘mature’ it will become.
The starter four hours after feeding. Source: DWD.
Once your starter rises and falls regularly after feeding, you are ready to bake bread!
Please note:
It is important to always replace the starter that you throw away with equal quantities of flour and water.
If you struggle to find a warm spot in your house, simply increase the temperature of the water you use when you feed the starter. Anything up to around 35c is fine (a little warm to the touch) but try not to go any higher than this as it will inhibit the fermentation process.
If you have any questions, or would like a FREE tub of the sourdough starter I use, please comment below or email me at: hugohharrison@gmail.com and I will reply within 24 hours.
For me, there is no scent or taste as nostalgia-inducing as cinnamon. It is the spice that sparked my love for baking. It’s smell can take me back to dozens of Christmases and Easters in an instant, and the flavour never fails to bring a smile to my face. I have wanted, for a long time now, to create a sweet recipe that can do this delicious ingredient justice, and I finally think I have. Scrolling through my Instagram feed on Saturday morning gave me the push I needed, as photograph after photograph appeared littered with scrumptious cinnamon. Of course, it was Cinnamon Roll Day (Kanelbullens Dag).
Cinnamon curls. Source: Dealing with Dough.
This recipe differs a little from other cinnamon rolls as it uses laminated (croissant) dough. Consequently the method is a little longer and takes a bit of practice, but the sweet, buttery pastry you are left with makes it worthwhile.
I roll these cinnamon curls in sugar whilst they are still hot from the oven, but if allowed to cool first, a vanilla icing would work just as well.
Ingredients: (Makes 12)
1 quantity croissant dough (my own recipe available shortly)
100g light brown soft sugar
50g demerara sugar
1 heaped tbsp freshly ground cinnamon
70g butter, melted
200g caster sugar, for topping
1 medium egg, for egg wash
Method: Tip your chilled croissant dough onto a lightly floured work surface. Roll your dough out to a rectangle of roughly 20″ by 12″, at a thickness of no more than 4mm. Clean the flat top of the dough, now facing you, of all flour using a pastry brush.
Mix your light brown soft and demerara sugar with your cinnamon in a large bowl, using your thumb and fingers to rub out any larger chunks of sugar. This is your cinnamon sugar for the filling.
With a palette knife, spread the melted butter evenly over the dough, making sure to reach all corners and edges. Equally scatter over your cinnamon sugar, again making sure to cover all areas of the buttered dough.
Starting from the long edge closest to you, roll the dough up tightly until you are left with a long, thick shape similar to a swiss roll.
Using a chef’s knife, divide the roll into 12 equal parts, trimming the ends off first if you’re after a less-rustic result. Once cut, you can shape them: simply grab the end of each curl, pull on it a little, and tuck it underneath the rest of the curl as a base.
Place each shaped curl onto a baking tray lined with parchment paper. Place the trays into a black bin bag on a flat surface in a warm area (22-26c), and tie it closed. (The bin bag creates a perfect environment for the dough to rise, as it will remain the same humidity and absorb heat from the surrounding area.)
Leave the curls to rise for between 60 and 90 minutes, until they have increased in size by at least half. Once the curls have risen, give each a generous egg wash, (1 egg beaten with a small splash of water), and bake at 190Cfan/375f/gas mark 5 for 20 minutes, or until golden brown. Whilst each curl is still warm, toss in a shallow tray of caster sugar so that they are covered all over and allow to cool on a wire rack.
The coffee bean as we know it is the seed of a cherry-like fruit known as cascara. This fruit is usually discarded and at best broken down and used as a fertiliser. It can. however, be dried and brewed as a tea or used to create a cold brew. Coffee roasters Has Bean and Square Mile currently retail this dried fruit.
During the brewing process much of the cascara’s flavour and caffeine diffuses into the surrounding fluid, whether it be water in a tea or fruit juice in a syrup. The cascara in this recipe, from Square Mile, displays a delicious rose-hip sweetness. Here, I have steeped the cascara with pomegranate juice to form a fruit syrup/cordial.
Method:
1. Add the cascara and pomegranate juice to a pan on a medium heat for 20 minutes, stirring frequently and not allowing to boil.
2. After 20 minutes, pass the cascara-pomegranate mix through a sieve and set to one side. (The reason the blood orange juice isn’t added at this stage is so that it maintains it’s natural flavour, un-affected by the cascara).
3. In a large pan add the fresh blood orange juice and zest as well as the sugar and cascara-infused pomegranate juice. Stir the sugar until it has dissolved.
4. Over a high-medium heat reduce this mixture by half to form a glossy syrup. When reduced, place the syrup through a muslin cloth and store in a sterilised bottle or jar.
5. To serve, add 1 part syrup and 2 parts sparkling water over ice. Add a small bunch of mint and enjoy!
I wrote the first post of this blog during my time at a very special bakery. At the end of each dough shift I would walk home up a steep and wet Forest Hill Road – tired, covered in flour, but inspired. Brick House bakery was an inspiring place to be, and an environment that I doubt I will come across again in it’s entirety.
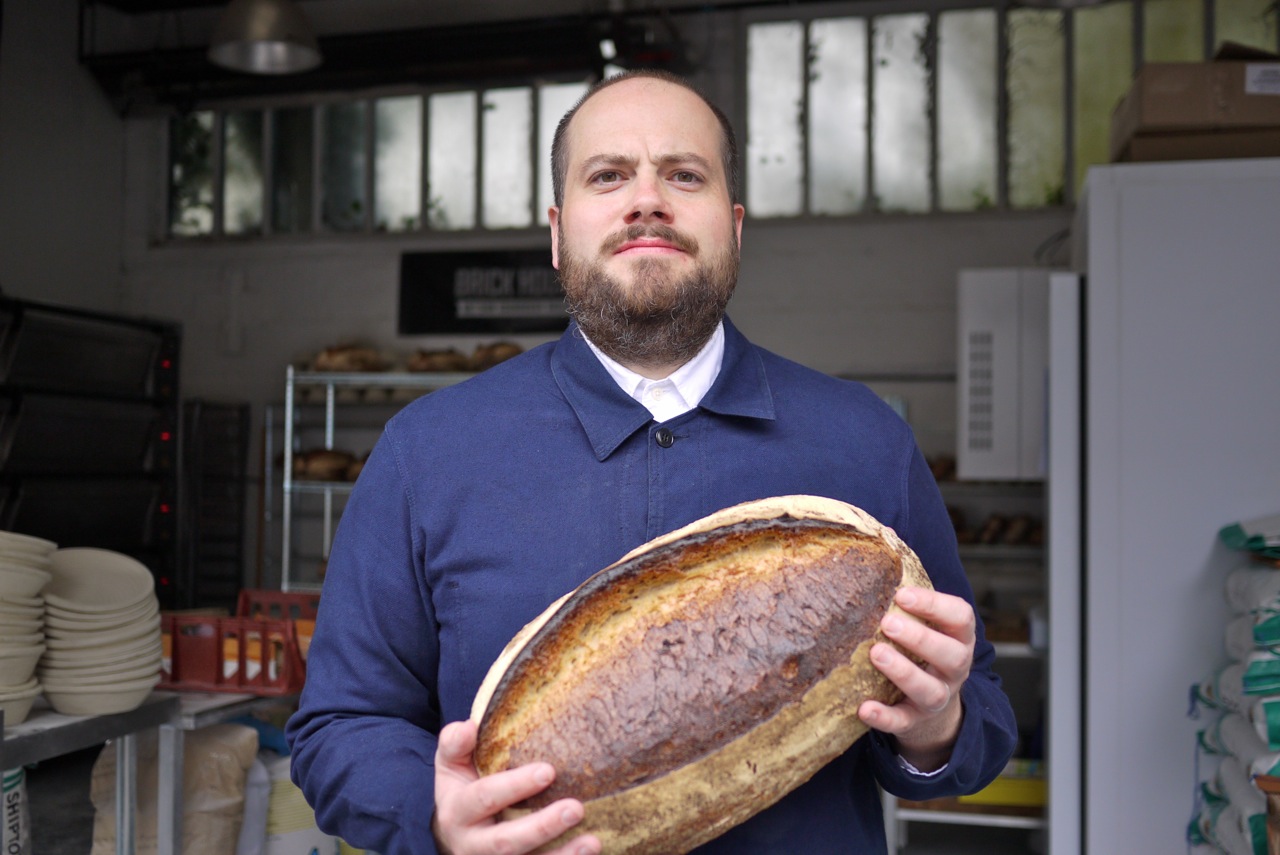
I have so far met two kinds of baker: he who bakes with his hands, and he who bakes with his heart. In December last year I was lucky enough to spend two weeks working with the latter of the two, Fergus Jackson and his team, in an industrial unit in Peckham.
Head baker Fergus Jackson
I started learning from the second I tied my apron, and continued to do so right through until I hung it up again on my last day. I began to gather little gems of information given to me every shift, and before I knew what was what I had a treasure chest. “When you fold the dough, pick it up as you would a book, and try not to claw at it with bent fingers” said Julia, a Canadian who had been baking with Fergus since Brick House opened in the summer of 2012. Passing comments like this may not have seemed much to the bakers at the time, but collectively they have changed the way I work with bread.
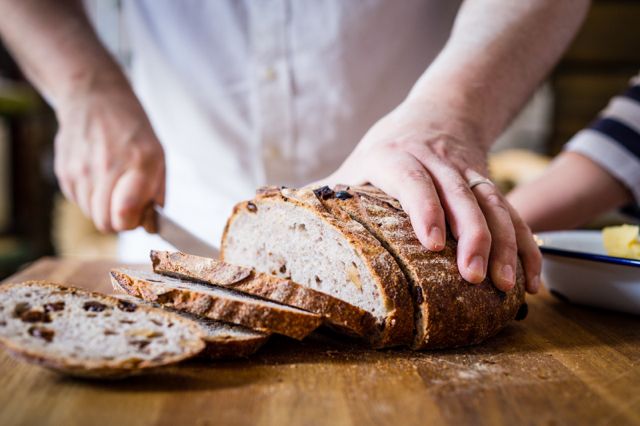
Brick House Multi-Grain sourdough
Every baker had contact with the dough from start to finish, with absolute minimal involvement from machinery. All senses were engaged in monitoring the dough’s progress, and making alterations in the method where needed. Without realising it I was learning something that no book could ever teach me: bread sense.
The slow-fermented loaves were baked daily to a standard that was dangerously close to perfection, both in taste and aesthetic. When I wasn’t baking I was laughing, and at no point did I want to be learning what I was learning anywhere else in the world. Almost all of the bakers previously had careers in other trades, but had turned their hands to baking. This communal choice meant that there was an extremely high standard of passion and enthusiasm. Standing at the dough bench shaping loaf after loaf was where they wanted to be, and this created an incredible environment to work in.
Brick House bread
I was taught the importance of temperature, technique and time at Brick House, all of which have made me a better baker, and have given me more confidence when I bake at home. More importantly, I witnessed the importance of bread. As cliche as it sounds, bread does bring people together. It’s the building block of communication, it speaks no language and can be shared by anyone, anywhere and at anytime. Seeing people visit the bakery while we were at work, in hope that there might be a loaf left from the last bake, proved to me its importance.
Fergus and his team, whether they would like to admit it or not, are changing the face of bread in London. They bake honest, wholesome and no-nonsense produce, and do so with a laugh and a smile that makes your loaf taste all the better for it.
My notebook had only ever been occupied by my timetable and scrawls of shorthand practice, but by the end of the summer it was brimming with formulas, figures and dough schedules.
What I needed to learn now didn’t lay on pages or on blogs or forums, only within a bakery, amongst mixers and dough benches. It was only here that I could pick up the priceless nibs of information that experience with the dough can teach. My only problem now lay in what I had experienced already. My time at Pump Street Bakery had left an impression on me for better and for worse. I now knew just how good bread could be, and wherever I went to learn next it was going to be hard to settle for anything less than that.
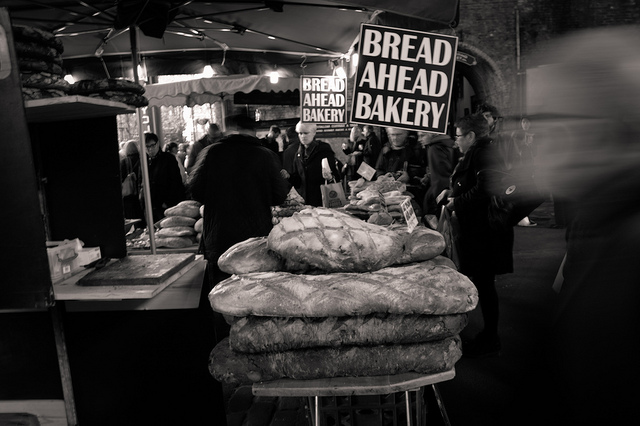
After a handful of e-mails, phone calls and a short bout of man flu, I had managed to arrange some time in Borough Market’s brand new bakery and bread school: Bread Ahead. I knew that bakers Matthew Jones & Justin Gellatly (inventer of the St John doughnut) were leading the bread side of things and despite the short time I would be there, I knew I was in for a real treat. Excited, nervous, and a little daunted – I packed my bag and boarded the train to London.
Justin scoring loaves. Source: Spitafields Life
My alarm rang at 4am the next morning, notifying me of the time rather than waking me. I had little sleep whilst trying to recount everything I had learnt so far, so as not to appear (as much of) an idiot amongst the bakers I would be working with the next day. I wrapped up and made my way through the dark and empty streets of sleeping London. In the shadow of Southwark Cathedral I found the bakery, a wide glass fronted building oozing warm light and a sensuous smell into the surrounding dark streets.
I was expecting to be shown the sink and broom, but after a brief tour I was put to work on their famously delicious bread pudding, cutting up the (very few) loaves left from the day before. “Nothing is ever wasted here!” Matt exclaimed.
Every time a new loaf was pulled from the oven Justin would bring it over to me and explain the scoring technique, the flour blend used, the hydration and how long it had been rising the night before.”Real bread should only ever be scored with a razor blade, and baked with a crust that makes your gums bleed,” Justin said, knocking the side of a white sourdough he was holding.
Gradualy the Shard lit up in front of me as commuters arrived one by one, all peering through the glass front of the bakery weary-eyed. Once the last loaves had been baked we began to pull a tower of proving baskets from the fridge, all waiting to be filled with today’s dough.
Justin had a strange and unique way of teaching, one that has stuck in my mind ever since. Earlier on in the day I had mentioned that I was relatively inexperienced in shaping, and was expecting little or no contact with the loaves that day. But, as the huge tubs of dough made their way to the bench Justin summoned me over and put me to work shaping the boules.
He watched on and would say nothing, which after 3 or 4 loaves began to concern me. Then he would stop and ask why I was shaping it that way and what I wanted the loaf to look like at the end – something I had never particularly considered before. I quickly lost the closed-mindedness I had arrived with, and instead of just following orders I started to think of the effects that my actions were having on the bread.
The day ended as quickly as it had started and before I knew it I was on my way home, back to the pile of textbooks and deadlines that awaited me. Over the course of the next two months between lectures, seminars and inconvenient library sessions, I would bake when I could.
Days were dedicated to books, and nights were dedicated to bread. One batch at a time I was getting closer to the loaf I was after. This became a regular routine until one day in November I received an email with the title: ‘When can you start?”
Until recently I thought this honey, whiskey and lemon combination was a drink exclusively for victims of winter’s illnesses, or those with trouble sleeping. That was until a Canadian baker I had the pleasure of working with suggested it as a festive alternative to a beer, for marking the end of the week in the bakery.
Admittedly I had to do some reading, as I wasn’t entirely sure of a reliable hot toddy formula. Eventually I found one, and as Friday arrived, so too did the hot toddies.
We added a slice of apple to ours, providing not only the delicious smell of spiced cider, but a little treat at the bottom of the cup when all the whiskey has been washed away.
Here’s a slight variation on the traditional Scottish hot toddy:
1 measure of whiskey
1 heaped tsp of honey
2 cloves
1 cinnamon stick
1 slice of lemon
1-2 tsp of lemon juice
1 mug of hot water
Add all the ingredients, besides the hot water into a mug. Pour over just-boiled water (90/95c) and give a good stir. The reason for using water that isn’t boiling here is that if it is too hot, the whiskey’s alcoholic properties can deteriorate, which isn’t very jolly at all.
Best enjoyed with Christmas Wrapping by The Waitresses. Merry Christmas everyone!