
Naturally leavened bread, or sourdough, is one of the most satisfying things a baker can wish to pull from their oven. It does take time and a little patience, but the result will undoubtedly be some of the finest bread you have ever tasted.
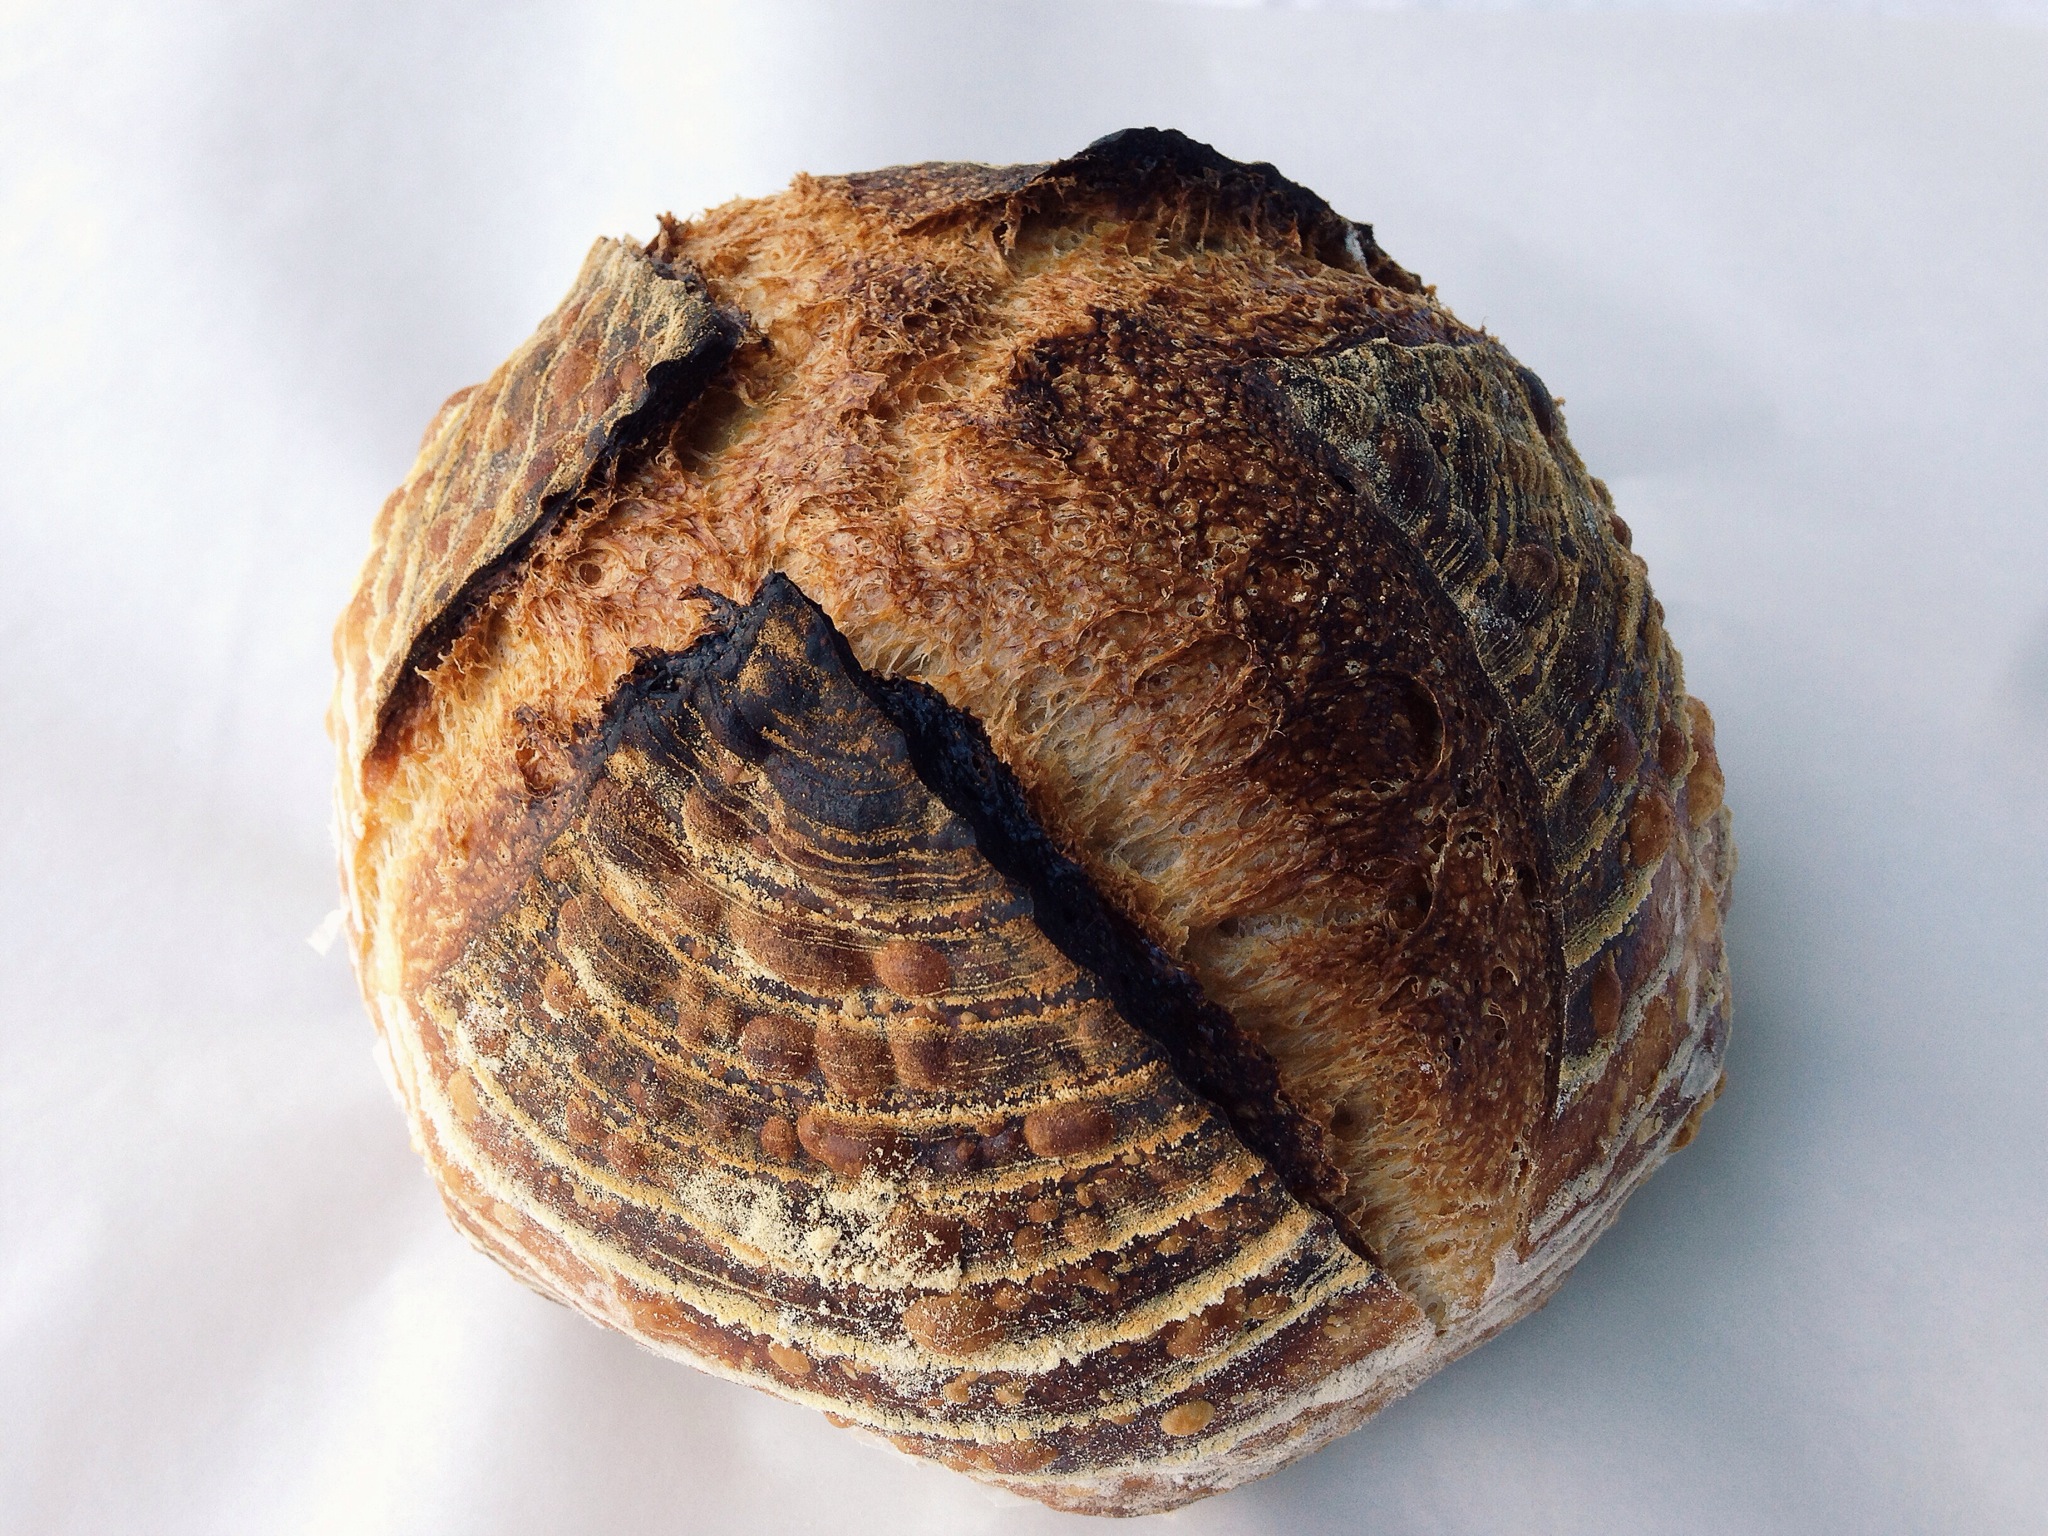
Sourdough’s name refers to the slight tang in flavor caused by the production of acids during the retarded (cold) final proof, which can last from anything between 10 and 18 hours.
With a good method and an attention to detail, anyone can bake great tasting sourdough at home.
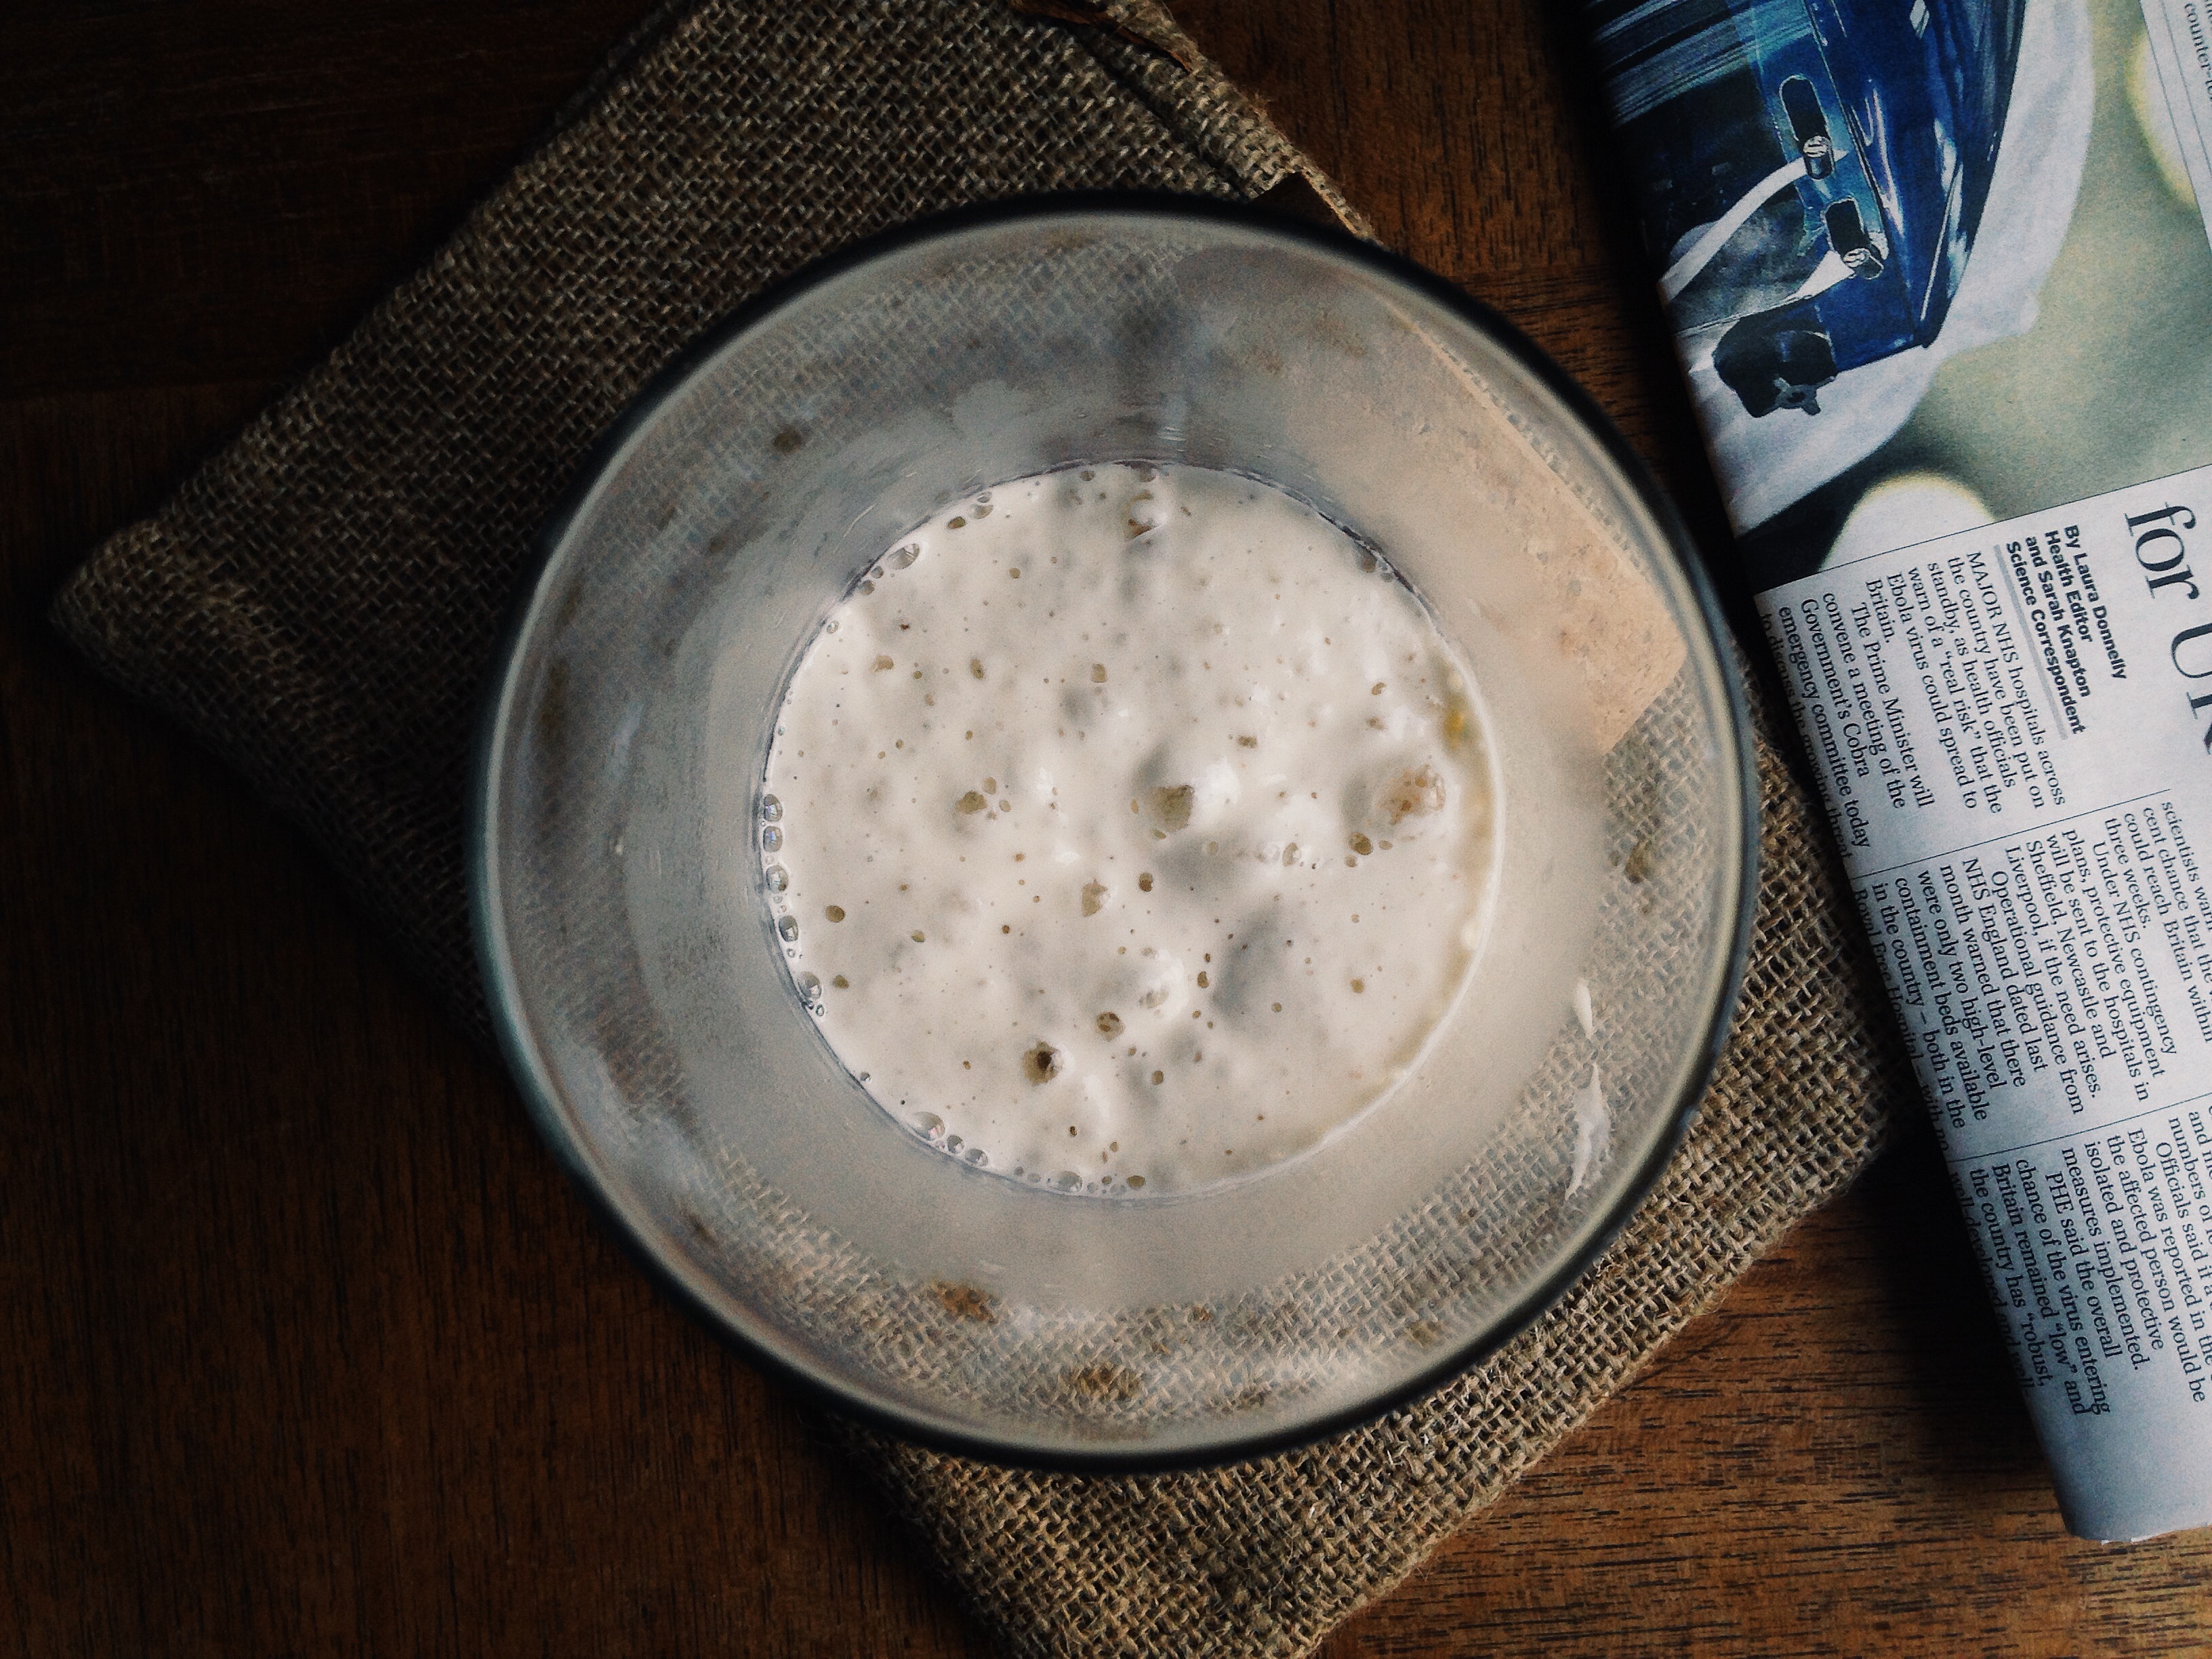
First, you will need what’s called a starter. This is a small quantity of flour and water that you leave to rest for a short period of time. With the help of natural bacteria (on your hands, in the air, in the flour), a yeast culture will form and it is this that you will use to make your bread rise.
You will use this starter every time you want to bake bread, so look after it: name it, nurture it, and make sure it’s always looking healthy.
The starter:
It’s important to be as accurate as possible when measuring flour and water quantities, and if you can, try to carry out each step at a similar time each day. Working the process of feeding your starter into your daily routine will make sure it is always strong and active.
You will need:
A set of digital scales, with at least 5g accuracy
350g strong white bread flour
350g water
Day 1:
In your container, mix together 25g of bread flour with 25g of water, using a fork to beat out any dry clumps of flour until you have a thick, smooth batter. Cover, and place in a warm spot (22-26c) to rest for 24hrs.
Day 2:
Scatter a little (5g) of bread flour over the batter and leave to rest for another 24hrs.
Day 3:
Add 50g of bread flour and 50g water to your starter, again mixing with a fork until smooth. Cover, and place in a warm area and leave to rest for another 24hrs.
Day 4:
By now your starter may be showing signs of life! Very small air pockets within the batter, visible from the side of your container, or a slightly acidic smell are both good signs that your starter is building up strength.
If your starter doesn’t exhibit any of these symptoms yet, simply scatter a little (5g) flour on the surface and leave to rest for another 24hrs.
If your starter is looking active, it is time to ‘feed’ it.
Pour away 100g of your starter, and to the remaining 100g in the container, add 50g bread flour and 50g water, beating together as you have done on previous steps. Cover, and leave in a warm place for 24hrs.
Day 5:
By now your mixture should be active. Discard 100g of your starter and add 50g of bread flour and 50g water. Mix together and cover, leaving it in a warm place for 24hrs.
Repeat step 5 for another two days, and by day 7 your starter should be strong enough to bake with.
After each feed you should be able to notice a regular ‘rise and fall’ in the starter. After you have fed it, the starter should appear relatively inactive, as it did at the beginning. It should smell milky and slightly sweet.

Two or so hours after the feed you should see an increase in volume, with air pockets in the batter visible from the side of your container and on top of the starter. It should still smell sweet, but with an acidic smell starting to build.

Roughly four hours after your feed the starter should be obviously active, often nearly doubling in size. At this stage the starter is referred to as ‘young’ and it should still exhibit a slightly milky aroma. The further into the 24-hour rest the starter goes, the more ‘mature’ it will become.

Once your starter rises and falls regularly after feeding, you are ready to bake bread!
Please note:
It is important to always replace the starter that you throw away with equal quantities of flour and water.
If you struggle to find a warm spot in your house, simply increase the temperature of the water you use when you feed the starter. Anything up to around 35c is fine (a little warm to the touch) but try not to go any higher than this as it will inhibit the fermentation process.
If you have any questions, or would like a FREE tub of the sourdough starter I use, please comment below or email me at: hugohharrison@gmail.com and I will reply within 24 hours.
